
Admin, January 11,2024
How To Solder Circuit Board
how to solder a PCB:
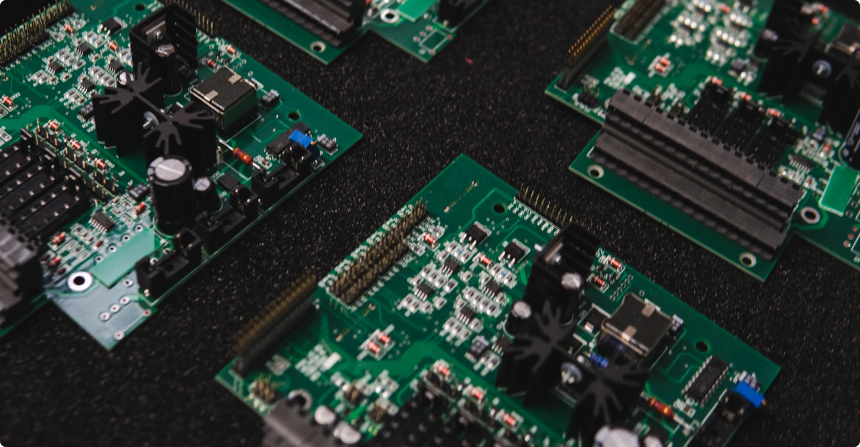
The printed circuit board has different components that manufacturers have to join through a specific material called solder. The assembler dissolves the solder to apply it to the parts that need bonding. In this post, we will discuss how to solder printed circuit board. A solder can connect metals like copper, gold, and silver, however, most engineers use copper, in this case. Some manufacturers also use lead and tin that makes an eutectic solder.
Types of PCB Soldering
Different soldering techniques are there, however, soft and hard soldering are very common. You can take the benefit from both techniques by following the right steps. Let’s discuss each technique to understand it better.
Understanding the Soft Solder
Now, we will see how to solder printed circuit board through a soft solder method. This technique uses a low heat such as 450 °C, and it is ideal for connecting the small parts. Assemblers use soft solder for larger boards having many components. Generally, it involves a tin-lead alloy with up to 400 °C or 752 °F melting point. This temperature can easily connect the components to the board. The process involves a gas torch to divide the heat to melt the alloy for soldering.
Understanding Hard Solder
Brazing or hard soldering helps to connect two elements through an alloy like brass or some other. The method is ideal for connecting metal surfaces and gives more durable results than soft soldering. It involves an atomic magnetism that helps in long-lasting bonding. It is also known as through-hole soldering. You have to spread the solder material on PCB components, including their holes. The process of high heating exposes the holes. However, make sure that bonding surfaces are free from debris or grease before soldering. How to solder printed circuit board through hard soldering is easy to understand. You can also do it using silver to fill the space that can recreate small elements on the PCB. But, experts don’t consider silver alloy as reliable as other metals.
Properties of Different Soldering Materials
Solders vary from each other in terms of their properties, like temperature and melting points. Solder becomes flexible in the form of a paste that helps metals stick to the solder when it is hot. A solder with high lead particles is heavier than the others. The gauge and wire diameter also vary, depending on the soldering material. The surface mount technology involves fine solder. Moreover, solders come up with and without lead of which lead-free solder is hard to handle due to a higher melting level. The lead-free solder includes copper, tin, and silver.
Soldering Tools
PCB assemblers use different soldering equipment according to the project. However, some basic but necessary tools are described below:
Printed Circuit Board: The main part of soldering is the printed circuit board where you perform soldering. You have to bind different components on the board during assembly.
Iron: You need an iron to provide heat that can melt the alloy. The soldering iron has different types and sizes, however, they are small in size. Generally, the shape of the iron is like a pencil having a tip, a wick, and a stick.
The tip of the soldering iron is copper which releases the heat to melt solder according to the desired bond. The stick or wand holds the iron, and the insulated surfaces protect the user from heat. On the other hand, a copper wire is used to make the wick to help clean excess material.
The iron comes up with a stand to hold it when not in use to protect the workspace from damage. You can easily handle the iron if you know how to solder printed circuit board.
Flux: Soldering flux is a material that removes rust from PCB components. Solder flux also blocks the air to protect the material from oxidation. Hence, it enhances soldering by managing the solder material’s surface tension.
Paste: A mixture of flux and solder makes a paste or adhesive. The paste helps bind the circuit board and its components.
Soldering Process
You have to follow certain steps for PCB soldering, such as:
Making the Iron Ready: You have to prepare the iron by coating its tip. First, you have to thoroughly heat the iron before coating its tip. Then, clean the excess flux that occurs during coating. Don’t let the solder iron run for longer as it can damage the circuit board by burning it.
Getting the Surface Ready: You must make your board ready for soldering, and it should be very clean. Make sure there the surface is not oily or dusty. You can use a cleaning pad for wiping and also remove the sticky particles by applying the air pressure with a compressor.
Arranging PCB Components: Experienced engineers start to solder smaller components before proceeding to larger parts as it keeps the board aligned. Moreover, you should first solder the bottom side which has no components. Grab some tiny parts and put them on the PCB by bending the lead at 45 degrees. Such an approach can help you easily put the components into the holes, keeping them intact.
The Heating Process: If you know how to solder printed circuit board, you should place the PCB on a heat-resistant surface before heating. Then, apply a little solder on the iron tip and place it on the board, as well as the lead. The material then gets hot for soldering and the entire process involves a few seconds. Don’t keep the iron down for longer to prevent overheating.
Joining Two Surfaces: After heating the solder, let the tip of the solder strand touch the lead and the pad. This stage involves a smooth flow of the solder material, liquefying the flux. Keep on adding the solder along the components, making a mound, and then remove the iron. Make sure the joint stays still while cooling and provides an even finish. Now, you can trim the excess lead with the cutters. Besides, the surface should be free from unnecessary flux or you will have to desolder it and repeat the process.
Things To Consider While Soldering
You must use enough solder to have a proper connection between the PCB pad and components. If solder is less than the required amount, it may lead to poor connection, creating a damaged joint. Similarly, more than enough solder can lead to unwanted connections or other issues. You should hire an expert in this case to avoid soldering issues.
How to solder printed circuit board manually involves good practice. You can start it with an old PCB and learn to install and uninstall different components. Such a practice can help you learn heat and time management to have good solder joints.
So, you don’t have to risk a brand-new PCB. However, if you cannot do it by yourself, you can approach some expert contractor with your requirements. The contract manufacturers have skilled and certified workers in this case. The CM can also guide you regarding the PCB design to prevent the soldering issues during assembly.
Frequently Asked Questions-How To Solder Printed Circuit Boards
1. What is PCB Soldering?
Soldering is a process of joining different components on a printed circuit board
2. What Kind Of Solder a PCB Has?
Both lead and lead-free materials are in practice for PCB soldering. However, engineers prefer lead soldering as it is easy to handle.
3. Is It OK to Directly Solder a PCB?
Yes, it is a common practice to directly solder components onto a circuit board. It does not involve any wires. The copper traces on the PCB connect different components.
4. What Are Important Soldering Tools?
Other than PCB, soldering involves different tools, such as iron, flux, soldering material, and paste. How to solder printed circuit board with these tools needs practice.
5. What Is The Meaning Of 60/40 Solder?
It means solder material having 60 % tin and 40 % lead, and it is softer than 50/50 solder. Its working time is high, besides, it is ideal for copper foil.
6. When Can Soldering Damage a PCB?
A too-hot iron can damage the printed circuit board while soldering. So, one should not leave the iron running unnecessarily.
Final Thoughts
How to solder printed circuit board
involves different steps. The printed circuit board has different components that you have to connect to its surface through a specific material called solder. Different soldering techniques are there including soft and hard soldering are very common. The assembler dissolves the solder to apply it to the parts that need bonding. Soft solder involves a tin-lead alloy with up to 400 °C or 752 °F melting point. This temperature can easily connect the components to the board.
Hard soldering is ideal for connecting metal surfaces and gives more durable results than soft soldering. You must use a balanced amount of solder to have a proper connection between the PCB pad and components. Too little or too high solder can cause different issues leading to PCB damage.
YOU MIGHT ALSO LIKE
Share: